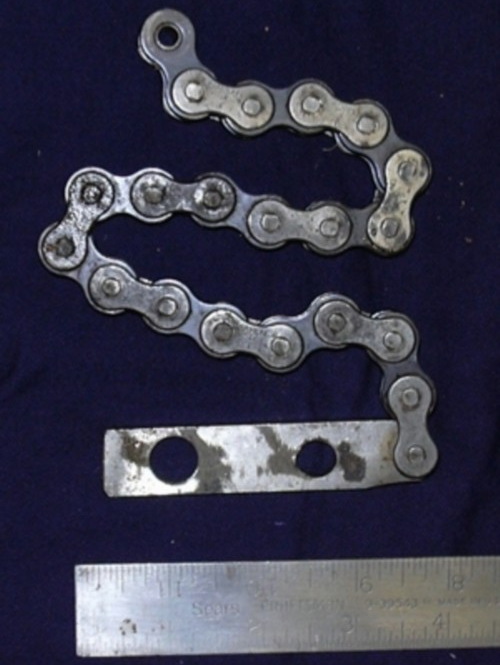
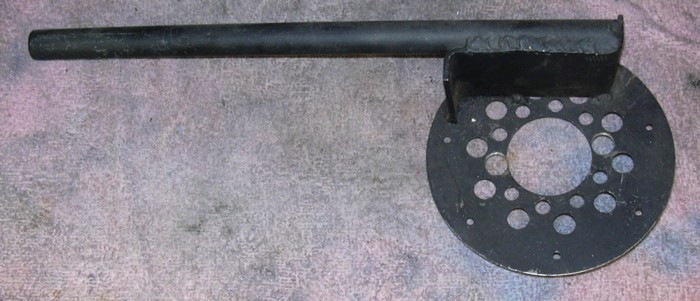
Chain Whip
This is the tool you'll need for holding the drive sprocket on the main shaft, whether it is the first step in removing a trans or whether it is just for changing the sprocket this tool gets it done easily. Basically you wrap the chain around the sprocket and anchor the bar to the crankcase. Some XLs have a 1/2" stud that sticks out of the crankcase, that is a great place to anchor the bar. For other XLs that don't have the stud, I use one of the sprocket cover mounting bolts. Stack up some washers between the bar and the crankcase and snug the bolt down, this will minimize side loads that can damage the sprocket cover mounting boss. I've used this tool on XLs, FLs, Yamahas, Triumphs and BSAs.
Get about six inches of an an old drive chain and a steel bar about 3/4" wide and 5/16" thick and 2" to 3" long. Drill a hole in one end just big enough to fit over the pin on an old master link. I've got two other holes drilled in this one, one is 1/2" for bikes that have the 1/2" stud sticking out of the crank case the other is 3/8" for the 3/8" sprocket cover mounting bolts.

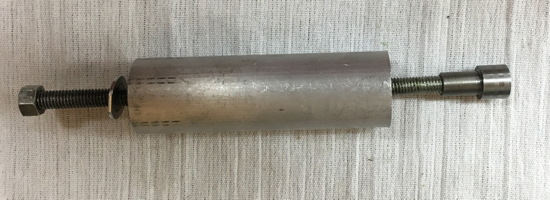
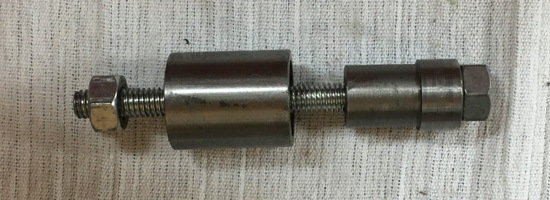
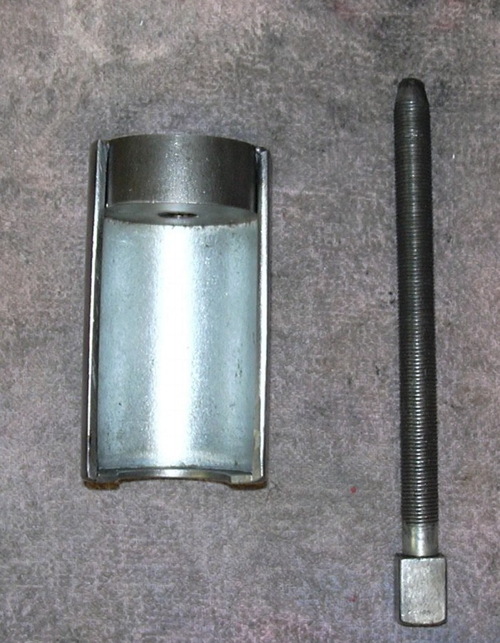
Flywheel Pusher
So you've completely disassembled the engine; primary and clutch out, tranny out, cams out and you're left with flywheels pressed into the left side of the case. What to do? That's easy; grab a big hammer and beat the flywheels out of the left case. Wrong; you will likely destroy the sprocket shaft threads and destroy the main bearing and race. What you'll really want to do is use your homemade flywheel pusher to gently push the wheels out of the case. You will prevent damage to the sprocket shaft and main bearing, thus ensuring that these critical parts can be safely reused.
To make this tool you'll need about $2.00 worth of material consisting of a chunk of steel about ¼" thick or thicker, some threaded rod and some round steel bar stock. For the actual pusher I used a screw from another puller, you may be able to get away with some hardened threaded rod (usually available at industrial supply houses). You might be tempted to just use the threaded rod screwed into the primary cover, but the bar stock really helps to stabilize the puller plate. You'll also need to weld a nut that matches the threads of your pusher screw to the back of the steel plate.
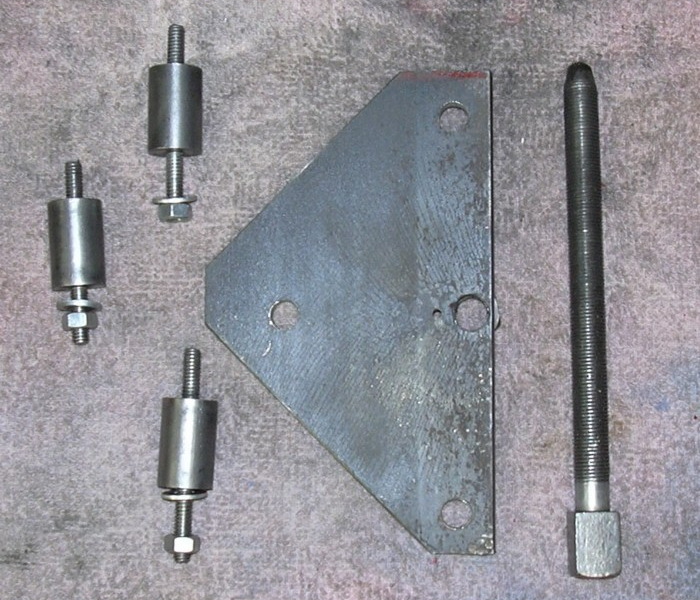
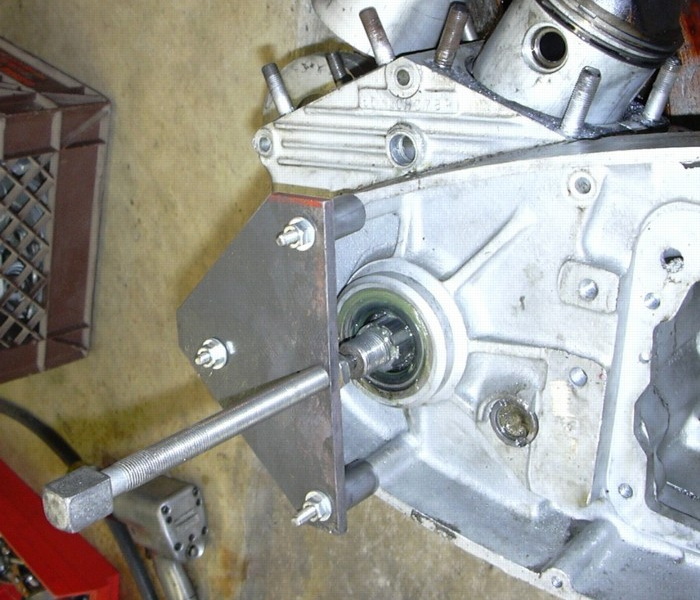
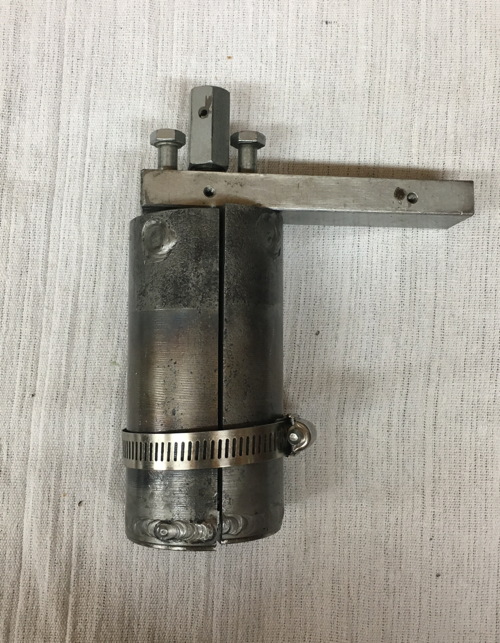
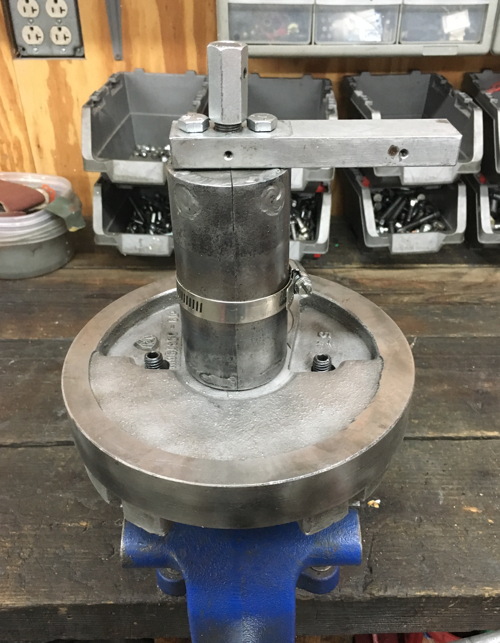
Sprocket Shaft Bearing Puller
So now you've pushed the case off of the flywheel and you are left with the inner main bearing pressed onto the sprocket shaft. So how do you get it off without destroying it?
Two tools are shown below, the one in the top row was my first attempt. Two bucks worth of raw material, a hunk of one and one half inch pipe, a chunk of one and one half inch bar stock and a heavy duty fender washer. Lop off a hunk of the bar stock drill and tap the center of it to match a jack screw out of one of your gear pullers. Cut the pipe more or less in half and cut a slot in the side of the heavy duty fender washer. Weld the washer and the hunk of bar stock to the pipe and you are ready to go. Unfortunately, it wasn't quite heavy duty enough and failed after several uses when pulling a very tight bearing. On the positive side, it was relatively quick and easy to make and did work for quite a while. For occasional use it is worth making. If you are planning on rebuilding a lot of engines go with version two.
The tool in the second row is my second effort. It was designed to be much heavier duty. I'm still using this tool and it shows no signs of distress. It did take a little more effort to put together and doesn't quite fall into the category of something that can be thrown together in 20 minutes.
The puller to the left and right was a down and dirty quick solution. It wasn't heavy duty enough and failed after pulling a really tight bearing. It will work in a pinch.
The puller below is much heavier duty, making it was a little more involved, but it is holding up much better.


Compensating Nut Wrench
If your bike has a compensator type engine sprocket you probably know that removing it is really a bitch. A lot of guys are content trying to beat it off with a big punch and hammer. Try this instead, get an old ½" drive socket and a steel bar, use a grinding wheel to cut a slot in the socket big enough to fit the steel bar in. Drill a couple of holes in the bar to match the hole spacing on the compensator. Stick a couple of 5⁄16" bolts in the holes and weld the whole thing together.

Panhead Clutch Hub Holding Tool
This is the tool you'll need to hold the clutch hub on a Panhead. An old steel clutch plate welded to some ⅛" thick steel plate bent to a "Z" shape to provide a little extra rigidity, welded to a piece of pipe.
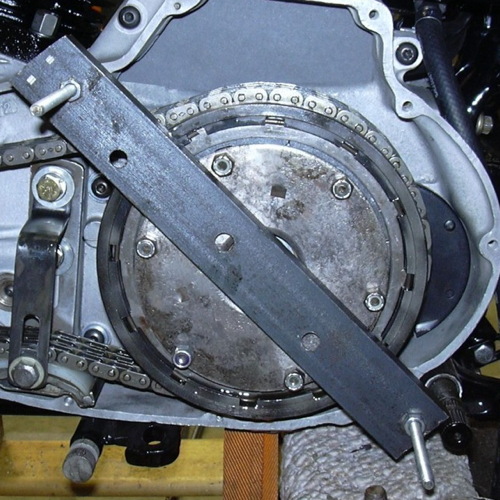
Primary Locking Tools
Working on the primary drive can really be a pain in the ass. What you need is a couple of bucks worth of hand made tools to make it a easier. Pictured below are five easy and cheap tools that make taking apart and reassembling the primary a lot less painful.
The first step in pulling the primary drive apart is removing the clutch. A chunk of u-channel or heavy bar stock and some 1/4-20 threaded rod is all you need to compress the clutch spring (or springs). It doesn't get much easier than this. Now you don't have to live in fear that the clutch spring will fly off at super sonic speed and nuclear force just as you loosen the pressure plate nuts down to the last thread.
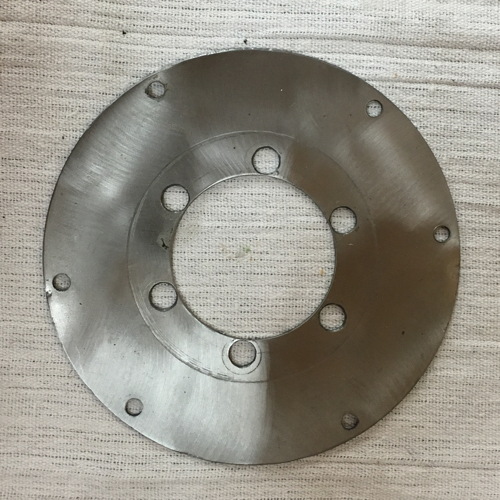
The second step in disassembling the primary is to lock the engine sprocket to the clutch basket, this will keep the engine from rotating when you put your big wrench on the engine sprocket nut. All you need is some steel strap, 3⁄16" thick by an inch wide will work just fine, some 3⁄8" threaded rod with nuts and some steel tube. Cut your strap to fit between the sprockets as shown in the picture. You'll want to grind the ends of the strap somewhat round to nestle in to the teeth on the sprockets. Cut the steel tube and threaded rod so you can pinch the steel straps between the sprockets as shown in the picture. Tighten the nuts and the two sprockets will be locked together and will not turn so you can easily remove the big nut on the motor sprocket.
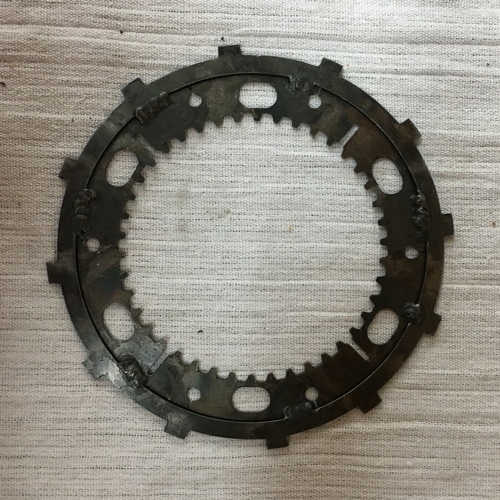
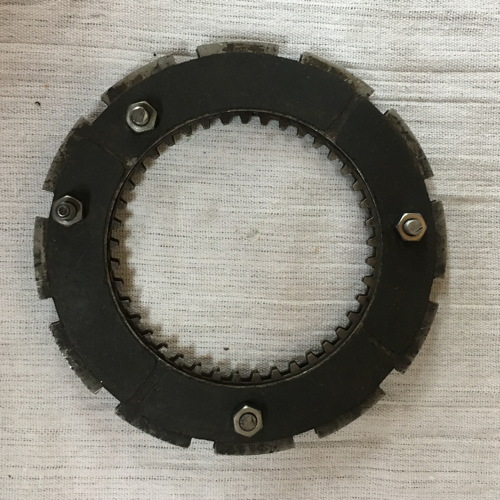
The last step is to take the big nut off the clutch hub. So how do you keep the whole mess from turning? You just locked the engine sprocket to the clutch basket, so if you lock the clutch basket to the hub, you'll be able to remove the clutch hub nut. Get yourself some old clutch plates. You cay the fiber plate on the concrete floor in your garage and beat the fiber friction material with a hammer, it will break off easily. Now you can weld the plates together. You'll need to weld or bolt the fiber plate to the steel plate in order to lock the hub to the basket. They will need to be correctly centered and aligned to each other before they are welded together, so set them in the clutch basket and mark them carefully, if they are not centered with each other they won't fit in the basket. If you can't weld them together you can just drill and bot them, they drill easily. The 900cc and 1000cc clutches are different, so you'll need two different sets if you are going to work on both clutches. That third disc is to lock the hub to the basket on a Barnett Scorpion Clutch. Barnett does sell a special tool, just guessing, it probably costs 100 bucks...
One last word for working on the primary. Bite the bullet, go out and buy sockets that fit the big nuts. Beating them off with a chisel and hammer is about as unprofessional as you can get. You will be amazed at how much easier those nuts come off when using a big breaker bar and socket that actually fits...

Piston Pin
Finally, for now, tools for piston pins. The piston pin is usually a press fit in the piston. You really don't want to beat it out with a punch and hammer. You can damage the rod bearings and possibly bend the rod. How about this tool instead? Aluminum bar stock bored out a little larger than the pin diameter and a hunk of threaded rod to pull the pin out. You can make a facsimile of this tool with a deep well socket. On the right is a piston pin bushing remover/installer. It works on the sake principle as the piston pin removal tool. This tool is lathe cut, so technically it is not something you can turn out with hand tools. But, it does come in real handy if you are trying to change bushing on a set of rods that is still installed in the motor. You want to avoid putting a side load on the rods at all costs.